Introduction
From time to time, computer components need to be upgraded—either because performance has deteriorated or because they are approaching the end of their lifespan. The latter was my situation a few months ago: my main desktop work computer had an old mechanical hard drive. Although I have a NAS to which all essential data from all computers at home is synchronized, I needed to replace the local drive to maintain good performance.
After reading up on the topic, I decided to upgrade from a SATA HDD to a SATA SSD of the exact same advertised capacity (or so I thought). Once home with both drives installed in the computer, I started cloning the data using the dd command.
Near the end of the copy process, while transferring the final partition, dd failed with an out-of-space error on the target drive—the target SSD was slightly smaller than the original HDD. Although I could have recovered the data using a few UNIX tools, I preferred a clean solution to ensure everything transferred without errors.
What to do in this situation?
The simplest option would have been to buy a larger capacity drive. However, since the original drive's last partition had plenty of unused free space, I decided to shrink the last partition on the source drive to fit the target drive's geometry and re-run the copy process.
WARNING: Perform the following operations at your own risk. Always make complete backups first.
Downloading Redo Rescue and booting via Ventoy
I remembered having a Ventoy USB drive that lets me boot live OS ISO images. I downloaded the latest ISO image of Redo Rescue (formerly Redo Backup) to perform the resize and copy operations offline without modifying the running system.
The setup is simple:
- Download the Redo Rescue ISO image.
- Copy the ISO file to the Ventoy USB drive.
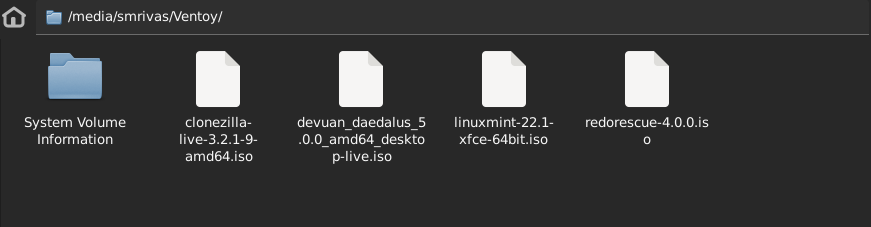
Reboot the computer with both drives connected and select the Redo Rescue ISO from the Ventoy boot menu.
Step-by-step process
Inside Redo Rescue, the goal is to shrink the last partition of the source drive so it fits within the capacity of the target drive.
Redo Rescue includes GParted, which provides a graphical interface and avoids manually running fdisk, e2fsck, or resize2fs.
On the source drive, the last partition was slightly larger than the target space:
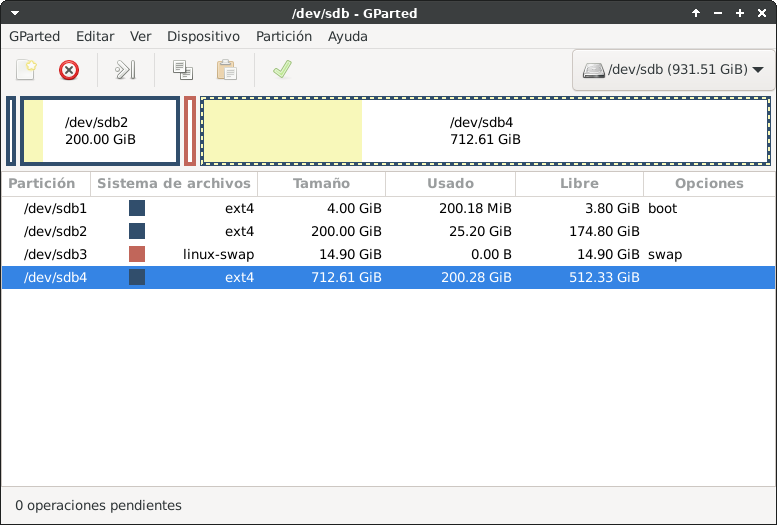
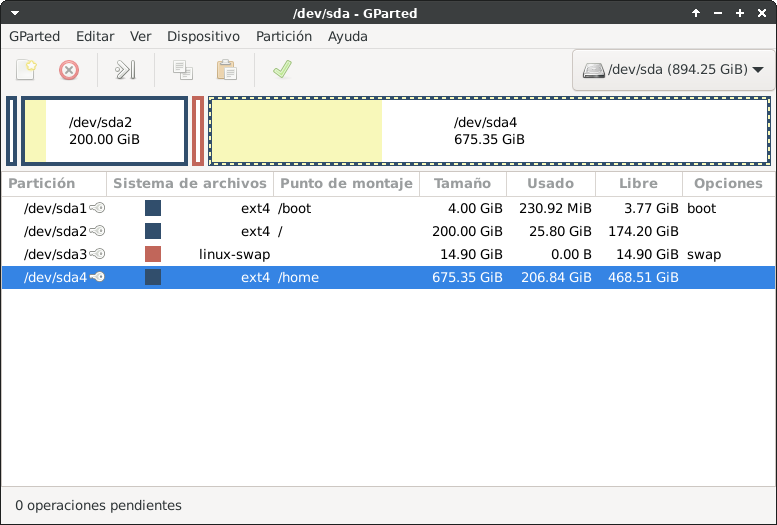
- Check the partition geometry on the target drive:
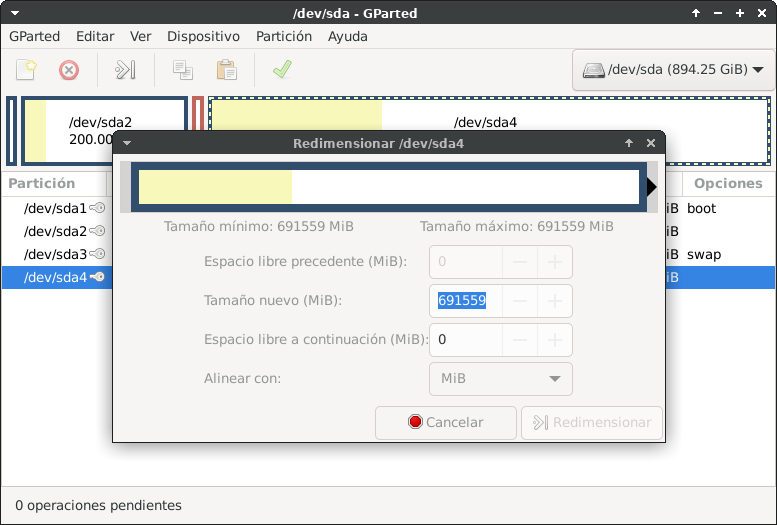
- Compare it with the source drive:
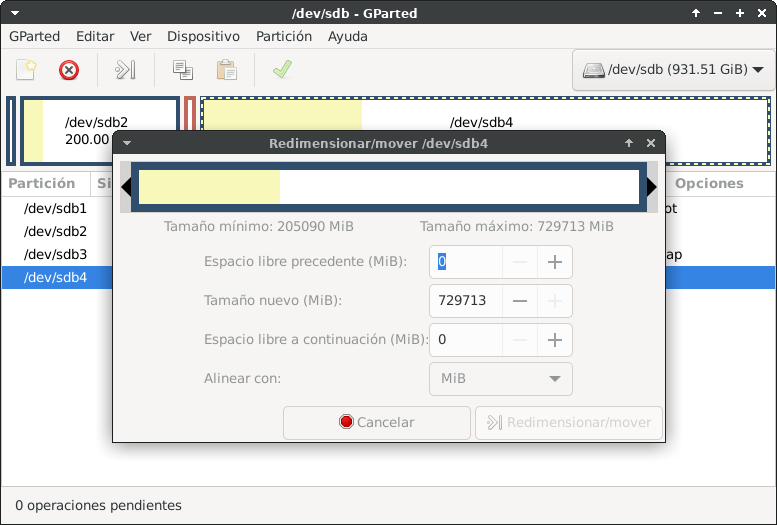
- Resize the source drive partition to make it smaller:
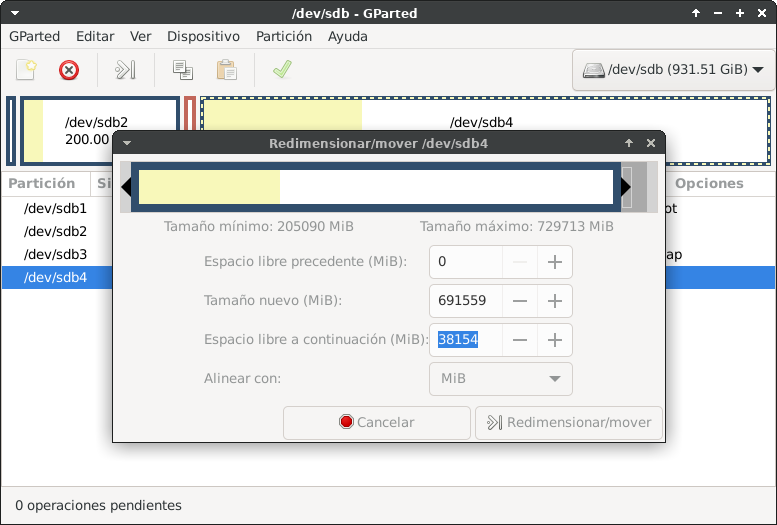
- Apply the operations:
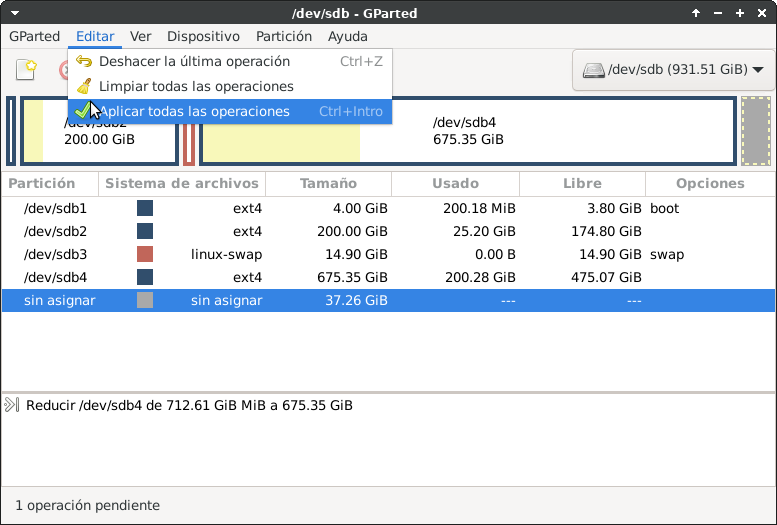
- The source drive will leave some unallocated space at the end:
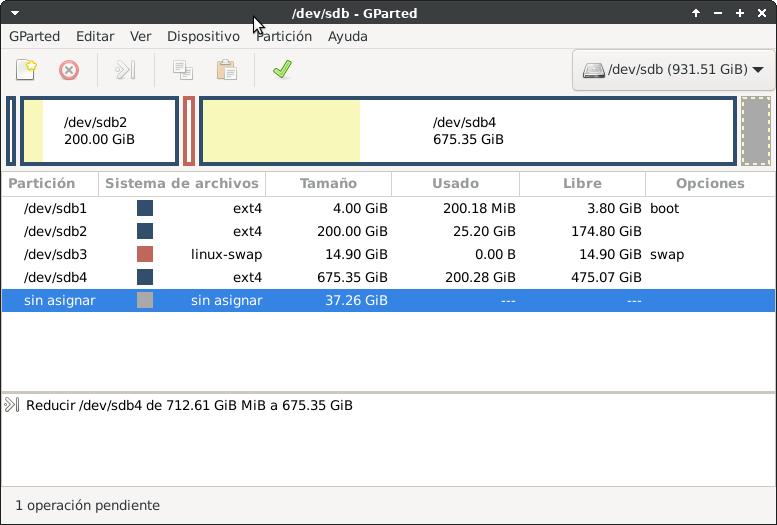
Now we can clone the system to the target drive using dd:
# Copy MBR
dd if=/dev/sdb of=/dev/sda bs=512 count=1

# Copy partitions
for i in {1..4}; do
    echo "Executing: dd if=/dev/sda${i} of=/dev/sdb${i} bs=1M conv=sync,noerror,notrunc status=progress"
    dd if=/dev/sda${i} of=/dev/sdb${i} bs=1M conv=sync,noerror,notrunc status=progress
done
Once the process completes, verify that the MBR contains GRUB and partition table info:
sudo dd bs=512 count=1 if=/dev/sdb 2>/dev/null | strings
ZRr=
`|f
\|f1
GRUB
Geom
Hard Disk
Read
8kTU
sudo dd bs=512 count=1 if=/dev/sda 2>/dev/null | strings
ZRr=
`|f
\|f1
GRUB
Geom
Hard Disk
Read
8kTU
Replacing the old hard drive with the new SSD restores the system to full performance.